-
What I am Working On : Decrease and Invisible Decrease Videos
I thought it high time to post a couple more How to Crochet Amigurumi videos on my Ink & Stitches YouTube Channel.
-
What I am Working On : Dad’s Illustration and Happy Sunflower
Updated: 5/27/2016 – Scroll to the end of this post for the update!
This week, I have been gearing up for my first giveaway: a crocheted Happy Sunflower (see this post to be entered to win)! Since the giveaway goes from now until 3/14/16, I am working on getting the sunflower made up and ready to ship. To the right is a progress pic thus far. As you can see, I’ve made the stem, back of the head and almost one whole leaf! I know it doesn’t look like much, but just you wait until next week’s progress pic!
-
-
What I am Working On: More YouTube Videos!
This week I continued working on editing my book, Adeline and the Mystic Berries (see last week’s What I am Working On post for more on editing this story). I finished the in-line edits and have moved onto reorganizing and deleting chapters, and also writing new scenes as well. This part of the process will definitely be the most time consuming. It is also a lot of fun, to add more scenes in with my favorite characters (like, Aspen, seen above).
-
-
A to Z Challenge: S is for Sock Puppet
Since I began working at the library over six years ago, I have been involved in several side projects along the way. I’ve made posters for Bike to Work Day and Earth Day events; created a shadowbox fish tank with illustrations that fit over a book cart (a future post to come on this project) for Staff Development Day; and my most recent venture which had me creating a video for another Staff Day where I created sock puppets to be the actors for the story.
-
A to Z Challenge: N is for New Camera
I’ve always used my phone’s camera, to take all the pictures seen in my blog thus far. When I dropped it over six months ago on my parent’s tile floor, and the case decided to open like a bird in flight letting the screen take the brunt of the impact, the glass didn’t stand a chance!
It was cracked and getting worse by the week, but it was functional, and I could still take pictures with the camera on the back side of the phone. Good as gold, right? I thought so too, for awhile. I was still only about six months into a two-year contract, so I had a year and a half to wait, before I could get a new one. Of course we didn’t have the insurance that covered a cracked screen. That would have been too easy. It’d be just fine.
I could still do my work. I’d just hold the phone away from my ear during calls, so the sharp bit up in the corner, where shards had started to chip away, wouldn’t cut me.
Everything was going perfectly okay, until I started noticing that every picture I took had a black spot in the lower right-hand corner. If I zoomed in, it would go away, but for standard pics, it was there like an eyesore.
“Please let me get you that camera,” my husband kept telling me. He’d been wanting to get me the Nikon Coolpix P900. He showed me its incredible zooming capabilities on this YouTube video. The cost was roughly $600 give or take, but he considered it an investment in my work. With plans to start my own YouTube Channel of How-To videos for those wanting to learn to crochet or make amigurumi, and no means to film them, I finally gave in.
So, here is my shiny new Nikon Coolpix P900 camera (see image above)! Isn’t it pretty? Look at this pic we took night one after getting it:
With the camera’s telescoping capabilities, you can see further than you’d ever expect a camera’s zoom lens to go.
Now, I can get my videos filmed and posted for all you crocheters out there, and I won’t have to worry about seeing a little black spot on every picture (see post
V is for Video
-
A to Z Challenge: M is for Making Amigurumi Patterns
Once you get comfortable working up other crafter’s patterns, why not try making your own? You will begin to understand how increasing and decreasing stitches can change the shape of your piece while crocheting in the round. I made other crocheter’s patterns for about two to three years before feeling confident enough to make my own.
Fair warning: just like in writing stories, there is always revising in pattern writing and it often takes making rows and ripping them out several times before you get the shape just right. I have included a picture of my pattern writing process for you here, to illustrate what I mean. Sad to say, the center picture is not my own and has nothing to do with the pattern. I just wrote the pattern around it. The leaf is what I was working on making here.
Looks a bit scary doesn’t it? Let me just say this though, even after crossing out and reworking each piece, I eventually got it just the way I wanted it. The end result is always worth the revisions made to get there.
When you look at a character you want to make in crocheted form, the first thing you should do is break down the character into its most basic form: shapes. You will find many patterns will be made up of: circles, ovals, cylinders, half-circles, triangles, etc. Once you make the separate pieces, you will be able to give the amigurumi heart by embellishing with buttons, safety eyes, embroidered details, felt, etc, in order to bring out the character within the character.
How?
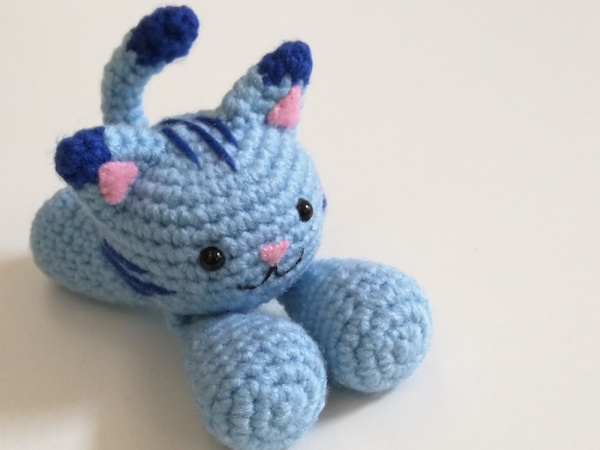
Why don’t we take a look at one of my basic patterns together? I have drawn up a very simple floppy-legged cat here:
Now let’s separate this character into its basic form, picking out the shapes that make up the whole picture. Below are the kinds of sketches I draw up to do this, when I am going to be coming up with a new character.
I break up the details so that I know where I plan to embroider, use felt, add poly pellets (little plastic circles generally used to stuff the bottom of the legs or body, in order to add weight), stuffing, etc.
Easy so far? Not too bad right? Let’s focus in on each piece, one at a time. The head of the cat is a circle. Circles are very common in amigurumi and they are also fairly easy to make.
Making a Circle:
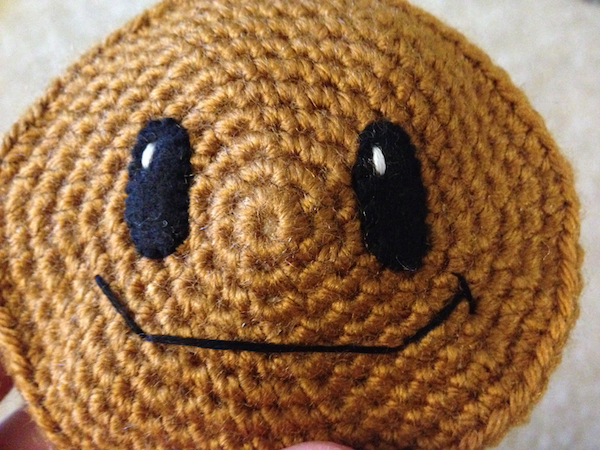
Often you will see patterns for circle shapes beginning with: 6sc (single crochet) in a magic ring – 6 (row ends with 6 stitches); from there, you increase in all stitches: inc around – 12; then begin the pattern: (sc, inc) around – 18; (2sc, inc) around – 24; (3sc, inc) around – 30; etc, until the head measures the circumference you want.
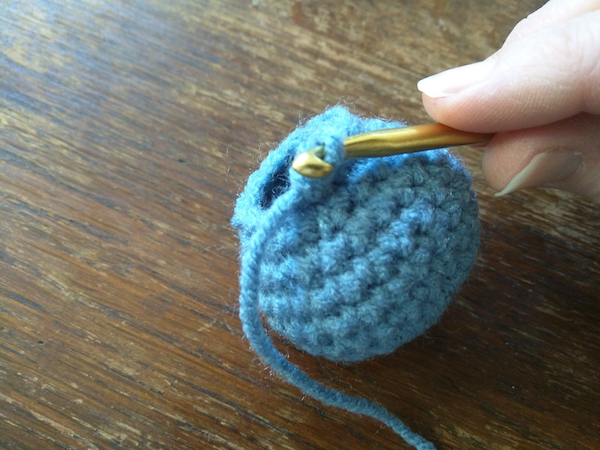
You can now begin single crocheting around to build up some of the height of the head. This is equivalent to more rows than you made during the increasing portion of the circle, if you’re looking to make a perfect circle. Once those are in place, you decrease (I like to use the
invisible decrease technique – invdec
-
A to Z Challenge: K is for Knitting vs Crocheting
If someone asked me which I prefer: crocheting or knitting, I would tell them without batting an eye, crochet, every time. Let me tell you why.
The differences between the two are like comparing a manual transmission vehicle to an automatic. In a manual car, you use two feet to drive. Automatics use only one.
Some people swear by manual transmissions, loving the control they give and the extra power that comes along with that.
Let’s just say, I never learned to drive a stick.
I prefer using only one foot to drive, as much as I prefer to use one hook to crochet instead of the two needles it takes to knit (sometimes more if you are working with double-pointed needles in the round).
Crocheting is just easier for me. If my hook falls out of the loop, and a stitch is dropped in the process, I can pick back up the previous loop on my hook and begin working into the next stitch again. No harm done. No hearts need to stop or breath needing to be held, while I search for my lost stitch.
When I knit, a dropped stitch could be disastrous! The little buggers can easily get eaten by the tangled web of stitches from the previous row. If I had done a purl stitch instead of knit stitch, as the pattern had called for, in a previous row, trying to go back to correct the visible error my mistake created, wouldn’t be as easy as it would be if I’d been crocheting the same piece.
In knitting, my fixes would consist of attempting to reverse knit in order to backtrack to the error in question; I could also take the stitches off the needles completely and unravel the working yarn until the row with the error is found. Once I reach the row with the error, I can pick up the prior rows stitch loops one-by-one onto my knitting needle, as I unravel the final stitches leading to the problem area.
Both options prove difficult.
With crocheting, especially when making amigurumi, all you have to do is pull the working yarn to unravel each row, backing the stitch marker to the prior rows start each time you reach it. Once you’ve back-tracked far enough, you can just pick up the one loop available and begin crocheting into the next stitch again.
With the stitches being worked one-by-one instead of having them all active on a knitting needle, crocheting is so much simpler in my eyes.
Not to say that I haven’t spoken to many people who find knitting an easier feet than crocheting. I even have friends that feel this way, who are avid knitters. They acknowledge the annoyance that happens when you drop a stitch, but they would choose knitting over crocheting any day.
Having told you my difficulties with knitting and admitting that I would pick crochet as my favorite any day of the week, I will say this: I still knit. I love knitting.
Will I be making my own patterns up in the near future? Probably not.
I don’t have that large a grasp of the medium to create something never been made before. For pattern-making, I will stick with making up crochet amigurumi patterns (see post for Making Patterns). I will still make other crafter’s knitting patterns as gifts for people. I love making slippers, ever since my mom passed the slipper-making torch over to me when her hands needed to give up knitting. My dad has had the same homemade slippers made for him since as far back as I can remember; made with tassels every time. I’m not going to be the one to stop that tradition.
I’ve made a shrug and blanket in the past as well. Knitting is very relaxing to me if the pattern is fairly simple. Someday, when there’s more time, I hope to make myself a sweater (preferably with pockets). A scarf would be nice too and maybe a pair of fingerless gloves. When it comes to making clothes, I would pick knitting over crocheting any day.
For my amigurumi though, just leave me with some yarn, a stitch marker, and a size E crochet hook, and I’ll be good to go. Oh, and a pair of scissors would be nice! Thanks.
Which do you prefer: knitting or crocheting? Why? What is your favorite thing that you’ve ever made with yarn?
Enter to win the A to Z Challenge Giveaway (amigurumi crocheted dog) here.
-
A to Z Challenge: I is for Invisible Decrease (Crochet)
I had been crocheting for a couple of years before ever hearing of a stitch called: invisible decrease. Decreasing wasn’t a mystery to me. I had learned to decrease (combining two or more stitches into one) at the same time as I’d learned to increase (adding one or more stitches into the same working stitch).
Before I get into what an invisible decrease is, I want to explain what a decrease of any kind will do when crocheting amigurumi. The purpose of a decrease stitch is to lessen the number of stitches in a row, or round in this case (as amigurumi are worked in the round). By doing this, you begin to close the hole of the piece you are making.
For example, if you are making a circle (to make things easy), decreasing would occur once you’re over halfway through the circle and you are beginning to round off the other side, thus closing the circle (remember not to forget to stuff before the hole gets too small).
Decreasing is the opposite of increasing. Increasing would be the part of the circle when you are just beginning to build up to the size you want your circle to be. By crocheting more than one stitch into the round prior, you are enlarging the round. To make an amigurumi circle, you would want the increases and decreases to be even all the way around. This prevents the circle from becoming anything but perfectly round.
In addition to the single crochet (sc), increasing (inc) and decreasing (dec) are the two most commonly used stitches in crocheting amigurumi. You can sometimes work through an entire pattern with only those three stitches under your belt.
When I saw the abbreviation, “invdec,” come up in a pattern, I immediately had to go to my trusty YouTube to figure out what that meant.
Any time you come across a term or a stitch that you’ve never heard of, I encourage you to go online. I prefer watching videos, because then I can see another set of hands making the stitch, while I am working to do the same with my own. Believe me, I wouldn’t steer you wrong here. You can get by looking at pictures that step you through the process as well, but the videos have been a life saver for me!
Invisible Decrease (invdec), as I came to find out, is a way of decreasing that allows the decrease stitch to be practically invisible. To a trained crocheter, you can still find them, but to anyone else, it is a much cleaner method of decreasing.
To illustrate the difference between a standard decrease and an invisible decrease, here are two pictures for reference. As you can see, the first one is the standard decrease and it leaves a larger, more noticeable stitch. This creates a bump in the piece, so not only can you see the decrease, you can also feel it as well. With the invisible decrease (seen here in the second picture), you can barely see that there’s been a decrease made at all.
Invisible decreases are made using the front loops only (FLO) of the prior round. By working in only the front loops, you are taking away some of the bulk (by leaving the back loops un-worked) that a decrease would normally create.
Step-by-step Instructions to Make the Invisible Decrease and Pictures to Illustrate:
