A to Z Challenge: I is for Invisible Decrease (Crochet)

 I had been crocheting for a couple of years before ever hearing of a stitch called: invisible decrease. Decreasing wasn’t a mystery to me. I had learned to decrease (combining two or more stitches into one) at the same time as I’d learned to increase (adding one or more stitches into the same working stitch).
Before I get into what an invisible decrease is, I want to explain what a decrease of any kind will do when crocheting amigurumi. The purpose of a decrease stitch is to lessen the number of stitches in a row, or round in this case (as amigurumi are worked in the round). By doing this, you begin to close the hole of the piece you are making.
For example, if you are making a circle (to make things easy), decreasing would occur once you’re over halfway through the circle and you are beginning to round off the other side, thus closing the circle (remember not to forget to stuff before the hole gets too small).
Decreasing is the opposite of increasing. Increasing would be the part of the circle when you are just beginning to build up to the size you want your circle to be. By crocheting more than one stitch into the round prior, you are enlarging the round. To make an amigurumi circle, you would want the increases and decreases to be even all the way around. This prevents the circle from becoming anything but perfectly round.
In addition to the single crochet (sc), increasing (inc) and decreasing (dec) are the two most commonly used stitches in crocheting amigurumi. You can sometimes work through an entire pattern with only those three stitches under your belt.
When I saw the abbreviation, “invdec,” come up in a pattern, I immediately had to go to my trusty YouTube to figure out what that meant.
Any time you come across a term or a stitch that you’ve never heard of, I encourage you to go online. I prefer watching videos, because then I can see another set of hands making the stitch, while I am working to do the same with my own. Believe me, I wouldn’t steer you wrong here. You can get by looking at pictures that step you through the process as well, but the videos have been a life saver for me!
Invisible Decrease (invdec), as I came to find out, is a way of decreasing that allows the decrease stitch to be practically invisible. To a trained crocheter, you can still find them, but to anyone else, it is a much cleaner method of decreasing.
To illustrate the difference between a standard decrease and an invisible decrease, here are two pictures for reference. As you can see, the first one is the standard decrease and it leaves a larger, more noticeable stitch. This creates a bump in the piece, so not only can you see the decrease, you can also feel it as well. With the invisible decrease (seen here in the second picture), you can barely see that there’s been a decrease made at all.
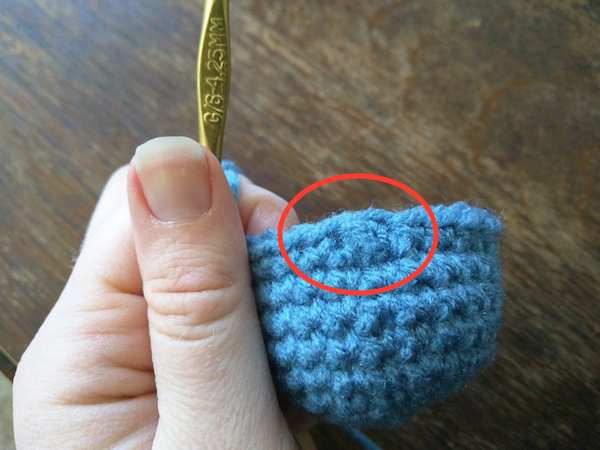
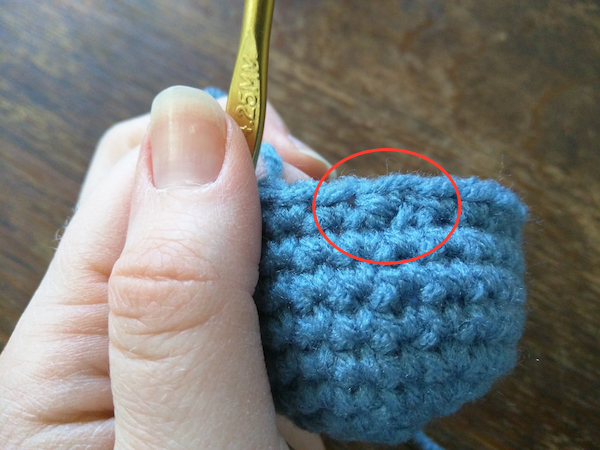
Invisible decreases are made using the front loops only (FLO) of the prior round. By working in only the front loops, you are taking away some of the bulk (by leaving the back loops un-worked) that a decrease would normally create.
Step-by-step Instructions to Make the Invisible Decrease and Pictures to Illustrate:
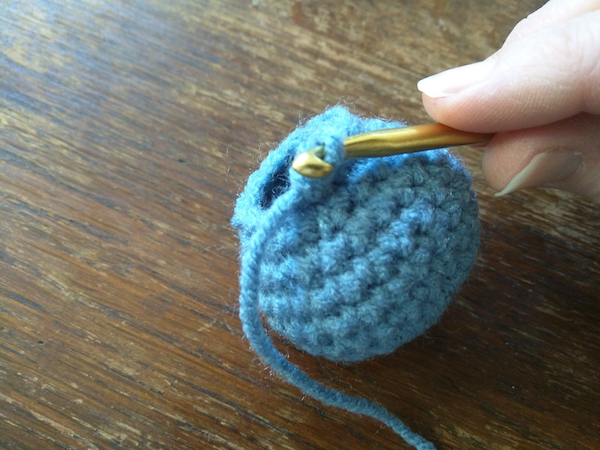
- Insert your hook into the front loop of the stitch you want to decrease (two loops on hook);
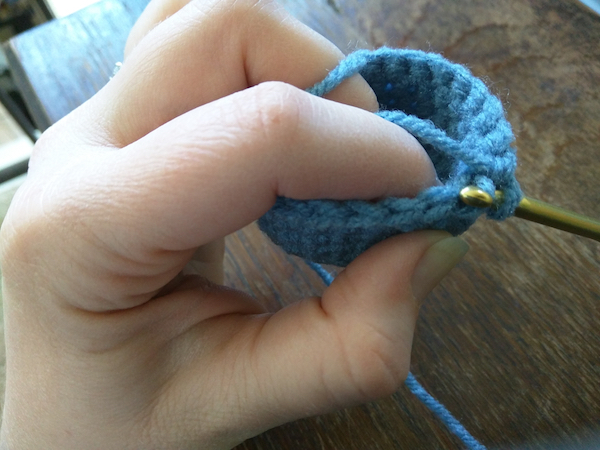
Step 1 - Insert your hook into the front loop of the next stitch in the round (three loops on hook);
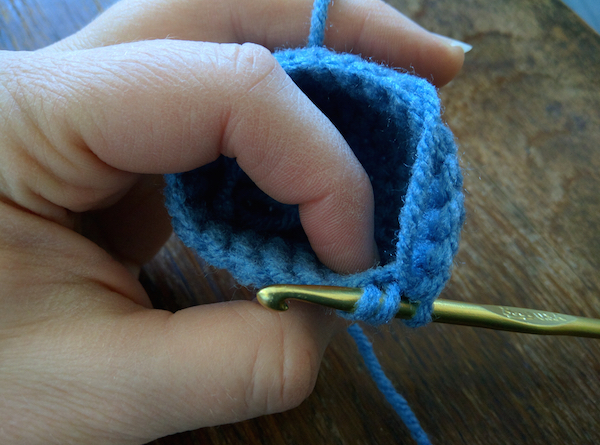
Step 2 - Yarn over (YO) (four loops on hook);
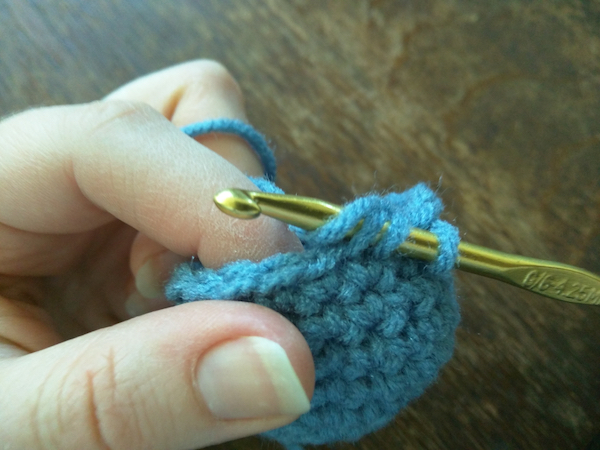
Step 3 - Pull working yarn through two of the loops (two loops on hook);
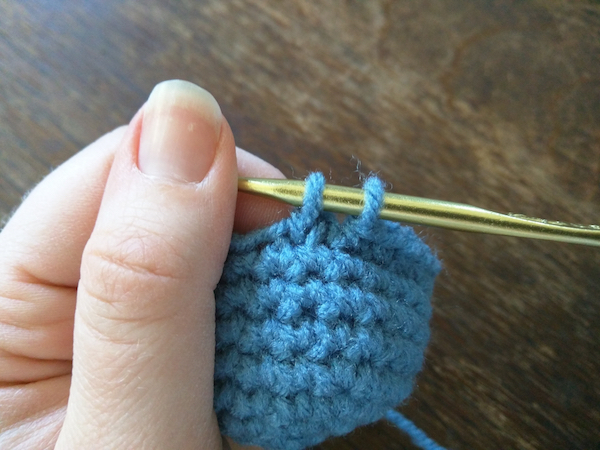
Step 4 - YO (three loops on hook);
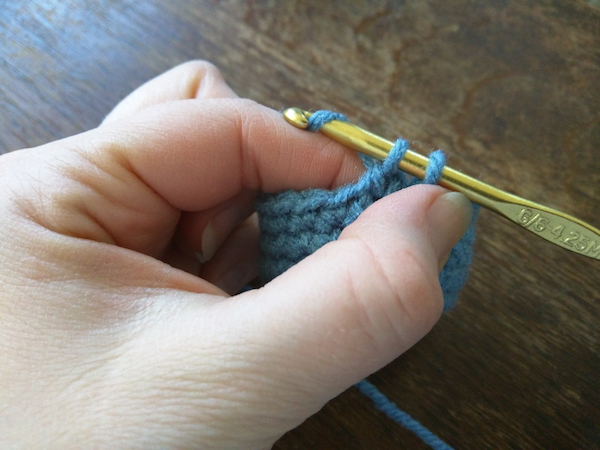
Step 5 - Draw your working yarn through the final two loops on the hook (one loop remains).
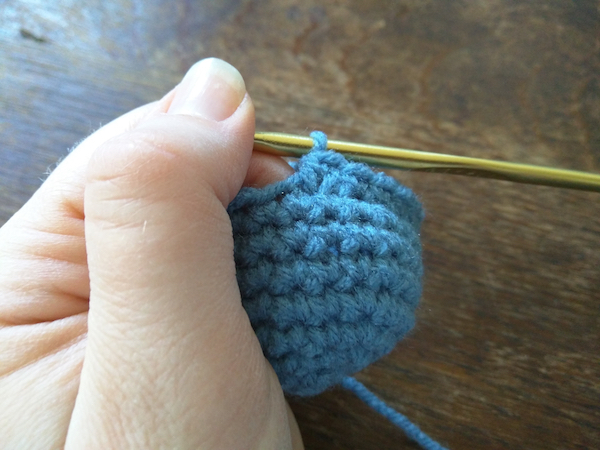
Step 6; Photo Credit: J.H. Winter
You have now made an invisible decrease (invdec), or single crocheted two stitches together (sc2tog) as it is often referred to in patterns **Note: dec and sc2tog, mean the same thing in crochet.**
Ever since learning how to do the invisible decrease, I haven’t gone back to using the traditional decrease. Invisible decreasing is a much cleaner way of decreasing, so I would hazard to suggest, when you are reading pattern instructions: any time you read “dec,” lets pretend the pattern-maker wrote “invdec,” because had they known about the invisible decrease, surely they would have used that instead.
Here are two videos I’ve posted to my Ink & Stitches YouTube Channel, outlining how to crochet both the standard Decrease, and the Invisible Decrease:
Decrease
Invisible Decrease
What do you think crocheters? Which do you prefer? Did you find the images and instructions helpful?
Don’t forget, the Giveaway is still going on throughout the month. Enter to win your very own amigurumi dog, here.




8 Comments
Karen
Great help !! Thanks so much
JHWinter
I’m glad you found this one informative! It is such a neat technique; I wasn’t sure how many crocheters knew about it.
Ashley Laveriano
Did you teach yourself or from a: family member, mentor, etc?
JHWinter
Crocheting in general, I learned how to make granny squares a long time ago from my mom. I picked up amigurumi making much later, and for that, I learned by self-teaching and using YouTube videos. I will have some new videos teaching how to make the various amigurumi stitches, coming up this week on my Ink & Stitches YouTube Channel. Come by and take a look in the coming days.
Susan Bruck
That’s really cool. I’ve been crocheting for a long time and haven’t come across that before. By the way, I write fantasy for MG and young adults, although I’ve been working more on picture books lately. (all are pre-published)
I’m going to try the invisible decrease next time I need to decrease. Thanks for sharing!
JHWinter
You are so welcome, Susan! It is a fabulous stitch to have under your belt. The only time I ever use a standard decrease now, is when I’m making a flat piece like a coat or dress for one of my characters. Since these are worked by chaining one at the end and turning the piece, then going back across the prior row, the back loop stitches left behind in an invisible decrease would be visible. On a circular piece, they are hidden inside, so nobody would ever know they were there!
Jennifer Shelby
Cool! I’ve been crocheting for a few years now without coming across this stitch. I’m left-handed, so your lovely photos and descriptions are Greek to me (#leftyproblems – it’s like looking at words in a mirror), but I’m sure I can find a left-handed version of the stitch on youtube. Thanks for putting me onto it!
JHWinter
I’m sure there are videos out there for lefties! Glad that I could turn you on to a new stitch 🙂