-
-
Making Amigurumi Patterns (Part Two)
How to Crochet Amigurumi from the Ground Up
I’ve been creating my own amigurumi patterns for almost seven years now, ever since I realized that amigurumi are made by knowing how to make shapes. Using decreases and increases to your advantage there is almost nothing that can’t be converted into a crocheted character. Deciding when special embroidery stitching would add some nice flare, finishes off each piece making it look professional and as true to life as possible.
In Part One of this making patterns series, I explained the ideas behind making a circle shape as well as a flattened triangle which you see often for animal ears.
For this post I’d like to talk about creating tubes and what they’re used for, as well as how to make teardrop shapes (often used for arms and legs).
Creating Tubes:
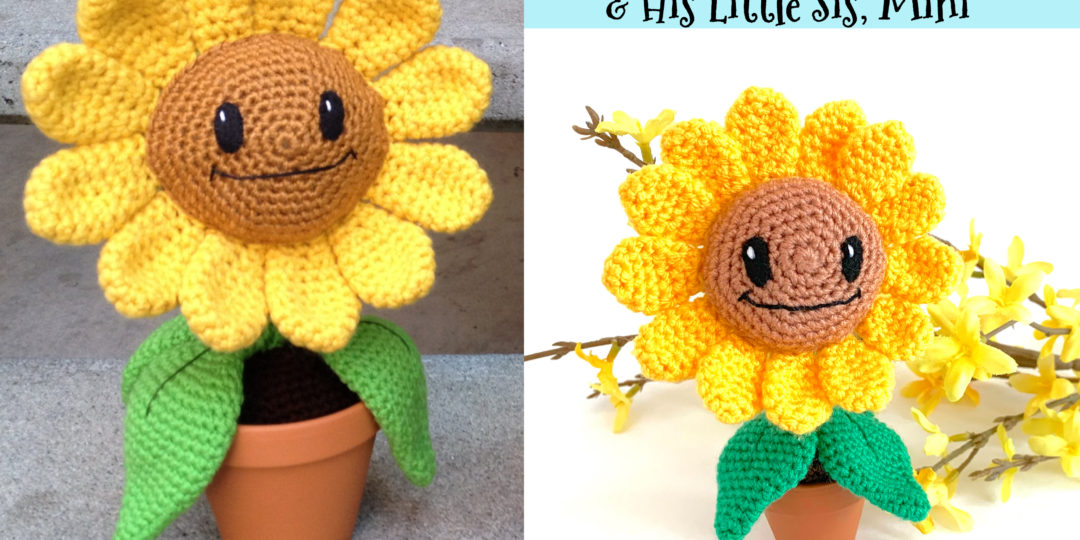
In order to create a tube, first you need to make a chain. Depending on how wide you need the tube to be, will determine how many chain stitches to begin with. For example, in my Happy Sunflower pattern (click the link to get the free pattern), the stem begins with 6 chain stitches joined together to form a ring to which single crochets are worked in the round to create the tube.
Sunflower Stem Pattern Instructions to Make a Tube:
- R1:ch6 (leaving tail), sl st in 1st ch to make circle, place stitch marker, sc around – 6
- R2 – 17:sc around – 6
sl st, FO, leave tail for sewing.
Ink & Stitches Video of How to Start Making a Tube:
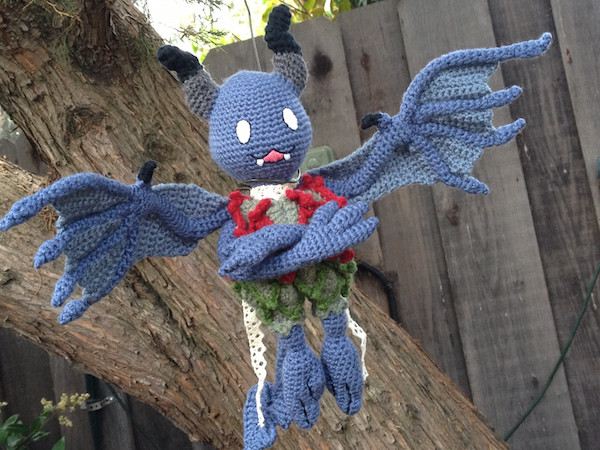
I used this technique not only on the stem of my Happy Sunflower, but also for the bat wings in my Veddel pattern. The upper wing is the only part with wiring, but creating a tube was essential to being able to fit the wiring into the piece in order for the wing to be posable. You’ll see tubes created to make legs and arms where often the arm is a tube and a separate piece is made for the hand or foot. They are a wonderful shape to make for allowing wiring to fit through, so you will find them used in crafting amigurumi often.
Teardrop Shape:
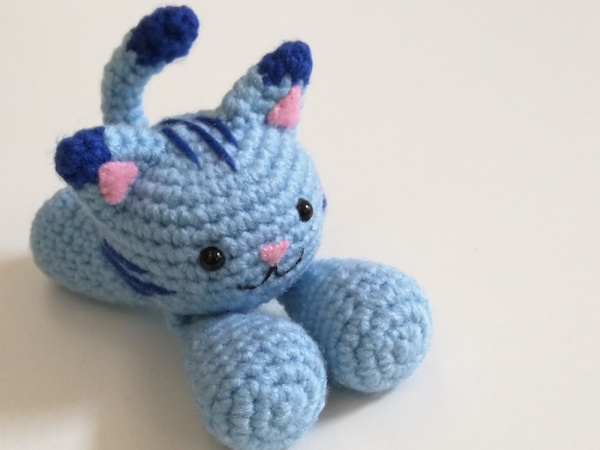
The teardrop shape, you will often see used for arms and legs of characters that don’t need defined fingers. Rather than decreasing to create a point at the top of the teardrop shape (for an arm it’s where the shoulder would be attached to the body), the shape ends while the top is still flat across. It would be very difficult to sew a point down to the body of an amigurumi and is much easier to sew down when the top is straight across. In order to make the top circle a straight line, the piece is just flattened together. Often you may want to crochet both sides together to create one solid line instead of having a circle, which helps to make the arms or legs even more floppy. I used this technique to make the arms and legs of my Floppy Cat pattern (click the link for the pattern).
To begin a teardrop shape, you build up the increase rows just as you would for a circle shape (see post on
Making Patterns Part One
-
-
A to Z Challenge: M is for Making Amigurumi Patterns
Once you get comfortable working up other crafter’s patterns, why not try making your own? You will begin to understand how increasing and decreasing stitches can change the shape of your piece while crocheting in the round. I made other crocheter’s patterns for about two to three years before feeling confident enough to make my own.
Fair warning: just like in writing stories, there is always revising in pattern writing and it often takes making rows and ripping them out several times before you get the shape just right. I have included a picture of my pattern writing process for you here, to illustrate what I mean. Sad to say, the center picture is not my own and has nothing to do with the pattern. I just wrote the pattern around it. The leaf is what I was working on making here.
Looks a bit scary doesn’t it? Let me just say this though, even after crossing out and reworking each piece, I eventually got it just the way I wanted it. The end result is always worth the revisions made to get there.
When you look at a character you want to make in crocheted form, the first thing you should do is break down the character into its most basic form: shapes. You will find many patterns will be made up of: circles, ovals, cylinders, half-circles, triangles, etc. Once you make the separate pieces, you will be able to give the amigurumi heart by embellishing with buttons, safety eyes, embroidered details, felt, etc, in order to bring out the character within the character.
How?
Why don’t we take a look at one of my basic patterns together? I have drawn up a very simple floppy-legged cat here:
Now let’s separate this character into its basic form, picking out the shapes that make up the whole picture. Below are the kinds of sketches I draw up to do this, when I am going to be coming up with a new character.
I break up the details so that I know where I plan to embroider, use felt, add poly pellets (little plastic circles generally used to stuff the bottom of the legs or body, in order to add weight), stuffing, etc.
Easy so far? Not too bad right? Let’s focus in on each piece, one at a time. The head of the cat is a circle. Circles are very common in amigurumi and they are also fairly easy to make.
Making a Circle:
Often you will see patterns for circle shapes beginning with: 6sc (single crochet) in a magic ring – 6 (row ends with 6 stitches); from there, you increase in all stitches: inc around – 12; then begin the pattern: (sc, inc) around – 18; (2sc, inc) around – 24; (3sc, inc) around – 30; etc, until the head measures the circumference you want.
You can now begin single crocheting around to build up some of the height of the head. This is equivalent to more rows than you made during the increasing portion of the circle, if you’re looking to make a perfect circle. Once those are in place, you decrease (I like to use the
invisible decrease technique – invdec
-
-
A to Z Challenge: A is for Amigurumi
Amigurumi is a Japanese word meaning crocheted or knitted, stuffed doll (Ami = crocheted/knitted; Nuigurumi = Stuffed Doll). Most of the pieces for these stuffed dolls, are worked by crocheting in the round.
The art of amigurumi had been widely enjoyed in Japan for decades, before making its way to the United States. It was in the early 2000s that it gained in popularity with sites like Etsy (an online marketplace for handmade goods) and
Ravelry