-
-
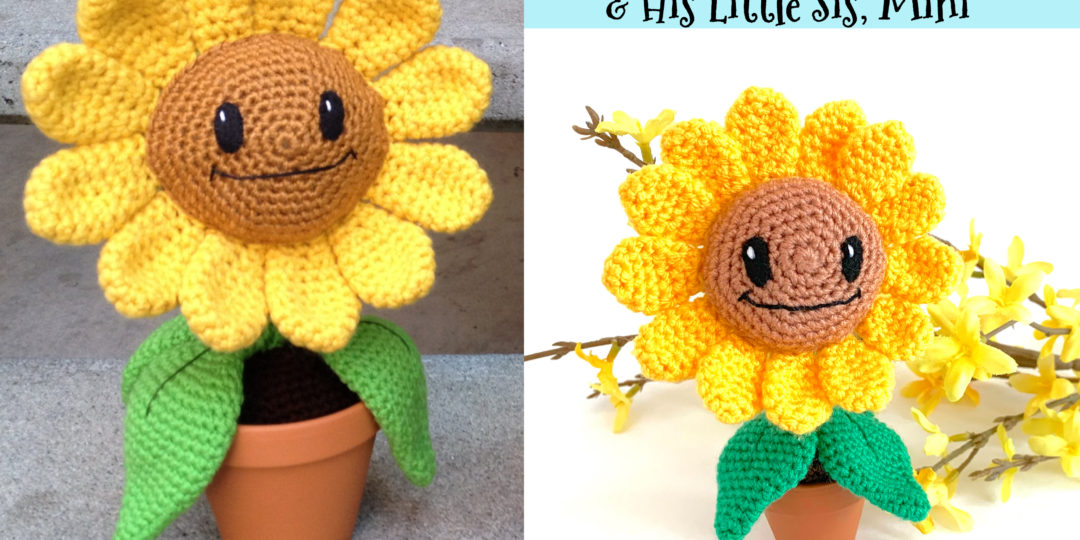
Saint Nick and His Turtle Doves Pattern Now Available in the Ink & Stitches Shops!
Christmas in February you say?
I know. I know. It seems a bit odd to think about the holidays already, seeing as we just had them, but now that I can get this pattern out to you guys, I wanted to ASAP.
-
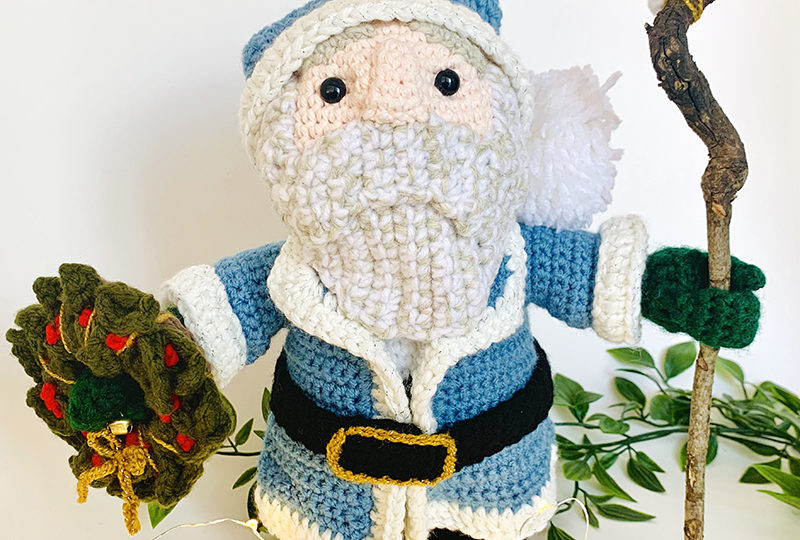
“Amelia Fang and the Barbaric Ball” : DIY Squashy Pumpkin Craft
I’ve been following author/illustrator Laura Ellen Anderson on Instagram for awhile now, and I was extremely excited to hear that her book, Amelia Fang and the Barbaric Ball, was coming out in the UK.
[I would later figure out that I could order her book here in the US from Amazon UK since it hasn’t been released here in the states yet.]
Laura had been doing a lot of pre-promoting of the book and that is when I noticed that she had taken her adorable pumpkin pet character, Squashy, and had made him out of clay, then painted him as a souvenir or perhaps a giveaway item. Either way, I had to have one!
Little pumpkins! ^____^ #pumpkin #halloween #ameliafang #autumn #3dmodels #scupting
-
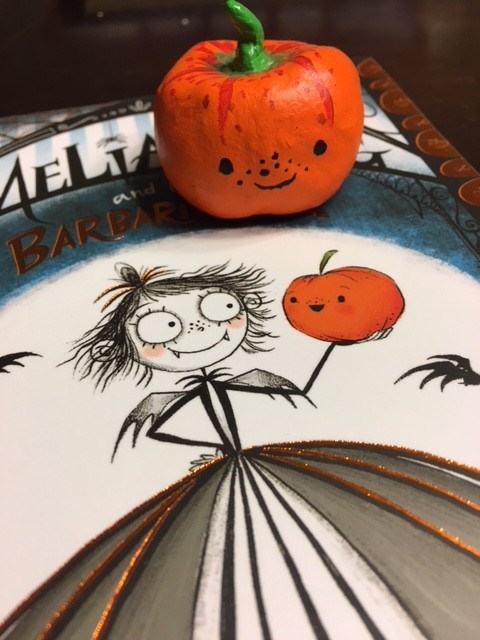
Craft for Kids: Finger Painting
When my son was only about a year old, we went to a birthday party where my friend had organized a craft for the kids. She’d provided small (8×10) canvases and Crayola washable paint, and had lined her entire living room floor with butcher paper. Her hope was that the kids would use their hands to make paintings and there would be minimal mess afterward.
My son was a bit young for this at the time, but I had an idea. I stripped him down to his diaper and created our paper plate palette of paints (say that three times fast!). Once we had our paints, I took his fingers and dipped them in the first color: red. He wasn’t sure of the texture of the paint and why I was dipping his poor little helpless fingers into it, but we began to paint. I dotted his fingers on one side with a sort of stippling effect on the canvas. I did the same on a few different areas of the canvas.
Next, we picked up a different color and began to layer our dots. Sometimes we had a few little lines where I’d drag his little fingers across the canvas.
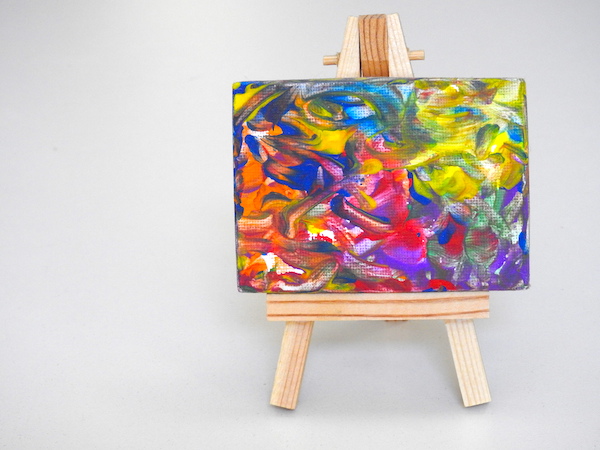
By the end, I had a child who wasn’t all that happy anymore, but we had a wonderful painting out of the deal. We’d covered the entire canvas and all four sides and it was now a frameable piece of art!
When the grandparents saw James’s masterpiece, they requested he make one for them as well. So, now at our own home and with no butcher paper to save our floors from mess, I took James into the bathroom tub to paint. I was in a bathing suit and he was just in his diaper again. Our apartment at the time was tiny and this was the only space I could be sure he wouldn’t get his hands all over the walls.
We used his fingers and toes and got to painting some more. This time, I had bought some of the same sized canvases as we’d worked with before (they can be found at the craft store in packs of ten), but I also found mini canvases (2″ x 3″) that you could buy little easels for displaying them on. What a great idea! James was my little Picasso; why not display his paintings on an easel? It made perfect sense.
Since I didn’t want to torture him any more than was necessary, we just got done all the paintings we would need to give as gifts in one sitting. Each grandparent got a big one, and then my mom and our house got one of the mini paintings with the easel. Paintings done and laid down on the ground outside of the tub, we got to taking a rainbow colored shower which was James’s favorite part of the entire experience. He has always been my water boy!
This is a great craft project to do with your kids. The paintings come out amazing and even if your kids are small, you can always use their fingers to do the painting. Just don’t be surprised if they aren’t as happy about it as you are. Just keep telling them that they are little painters making beautiful art to share with the world.
Once finished, the projects can be sprayed with a sealant spray (Krylon is a good brand) that will help to stop the paints from washing off. Also, keeping it away from water will help. You can use paint brushes and regular paint (not the Crayola, non-toxic kids paint) if your kids are a bit older as well for a more durable finish. I found that the Crayola paints and sealant spray worked just fine though.
What do you think of the paintings? Is this something you’ve tried before, or think you might try with your own kids?
-
Dragon Craft Project : Fun with Kids
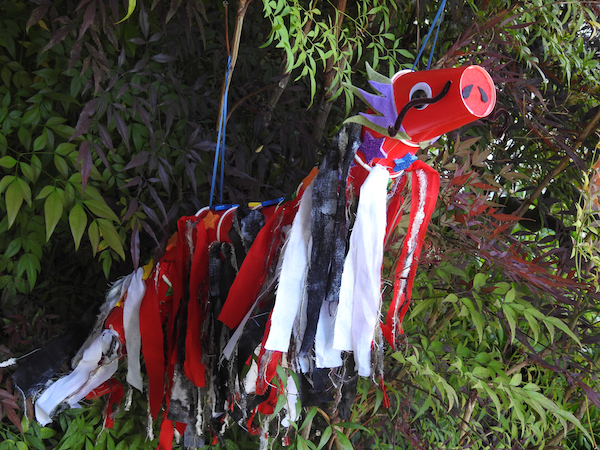
When this book, Fun Things to Do with Paper Cups and Plates by Kara L. Laughlin, came through the library where I work, I had to take a minute to thumb through the pages. The cover was too cute to let it slip through my fingers without a glance!
There are lots of fun crafts to do with your kids in this one, but my son is only 2 1/2 years old, so the project would have to be basic. Unfortunately, my favorite craft from the book that I just had to make, was the dragon (a bit advanced for a two year old) made with paper cups.
I had a few ideas as to how James could participate during this project, as well as some alterations and additions I planned to put in, that differed from Kara’s original design.
The first way James could help me was to pop the holes in the center-bottom of each cup. Don’t worry, I didn’t give him any sharp objects! I actually used a small meat thermometer for lack of options. I held the thermometer steady, and he pushed it down into the cups to make the holes. Let’s just say, he kept wanting more cups even though we’d already popped holes in the eleven we needed for the project. Hadn’t considered that one!
The first alteration I made was how I did the tail cup. I ended up not wanting it to be open and instead had the last two cup openings facing each other. To keep them from coming apart, I got out my trusty hot glue gun and glued them together (see my
H is for Hot Glue and Rock Sculptures
-
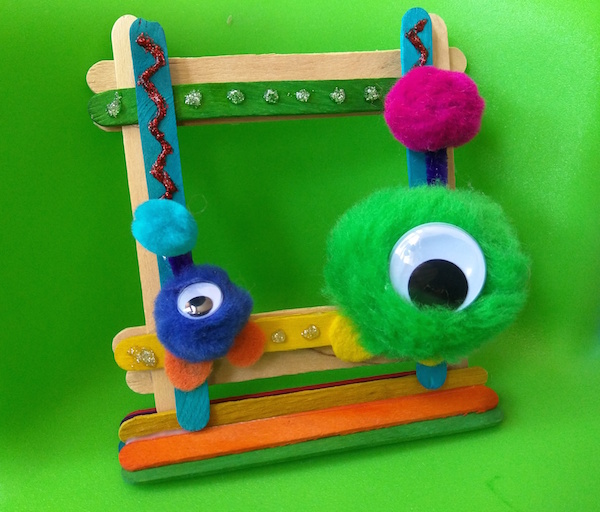
A to Z Challenge: P is for Popsicle Stick Picture Frame Craft
I was asked by the library where I work, to come up with some craft projects for kids. These were to be done at a “Crafts” booth for a local event the city was putting on.
I came up with two different crafts for the kids to choose from. One of the two was a Popsicle stick picture frame whose construction pattern came from DIY Family: The Wonderful World of Crafts. I have included my pictures below on the assembly as well:
You could choose to use the natural wood sticks if you want a more earthy look to your frame, or you could go wild and pick out the colorful sticks that come in all the colors of the rainbow. Since kids love color, I went with the colorful ones for the event.
The construction of the frame was ingenious and because of how the stand and frame are built, the frame can be used for a picture that is either portrait or landscape. If you have a picture in mind before you begin, you will better know how to decorate your frame (and where to put that little 1/4 stick, which is what holds the picture in place). Directions for the stand aren’t included here. You can find them, as well as detailed instructions for the frame, by following the link at the beginning of this post.
Decorating is where the fun begins!
I made several examples to show the kids. I had a caterpillar with some leaves, a cat one for cat-enthusiasts, and a monster one because, why not?
You can use whatever supplies you have to decorate: glitter, glitter pens, sequins, beads, felt, puff balls, pip cleaners, googly eyes, construction paper to draw on, etc.
You will need scissors and craft glue as well (hot glue can be used – see also,
rock sculpture hot glue craft
-
A to Z Challenge: K is for Knitting vs Crocheting
If someone asked me which I prefer: crocheting or knitting, I would tell them without batting an eye, crochet, every time. Let me tell you why.
The differences between the two are like comparing a manual transmission vehicle to an automatic. In a manual car, you use two feet to drive. Automatics use only one.
Some people swear by manual transmissions, loving the control they give and the extra power that comes along with that.
Let’s just say, I never learned to drive a stick.
I prefer using only one foot to drive, as much as I prefer to use one hook to crochet instead of the two needles it takes to knit (sometimes more if you are working with double-pointed needles in the round).
Crocheting is just easier for me. If my hook falls out of the loop, and a stitch is dropped in the process, I can pick back up the previous loop on my hook and begin working into the next stitch again. No harm done. No hearts need to stop or breath needing to be held, while I search for my lost stitch.
When I knit, a dropped stitch could be disastrous! The little buggers can easily get eaten by the tangled web of stitches from the previous row. If I had done a purl stitch instead of knit stitch, as the pattern had called for, in a previous row, trying to go back to correct the visible error my mistake created, wouldn’t be as easy as it would be if I’d been crocheting the same piece.
In knitting, my fixes would consist of attempting to reverse knit in order to backtrack to the error in question; I could also take the stitches off the needles completely and unravel the working yarn until the row with the error is found. Once I reach the row with the error, I can pick up the prior rows stitch loops one-by-one onto my knitting needle, as I unravel the final stitches leading to the problem area.
Both options prove difficult.
With crocheting, especially when making amigurumi, all you have to do is pull the working yarn to unravel each row, backing the stitch marker to the prior rows start each time you reach it. Once you’ve back-tracked far enough, you can just pick up the one loop available and begin crocheting into the next stitch again.
With the stitches being worked one-by-one instead of having them all active on a knitting needle, crocheting is so much simpler in my eyes.
Not to say that I haven’t spoken to many people who find knitting an easier feet than crocheting. I even have friends that feel this way, who are avid knitters. They acknowledge the annoyance that happens when you drop a stitch, but they would choose knitting over crocheting any day.
Having told you my difficulties with knitting and admitting that I would pick crochet as my favorite any day of the week, I will say this: I still knit. I love knitting.
Will I be making my own patterns up in the near future? Probably not.
I don’t have that large a grasp of the medium to create something never been made before. For pattern-making, I will stick with making up crochet amigurumi patterns (see post for Making Patterns). I will still make other crafter’s knitting patterns as gifts for people. I love making slippers, ever since my mom passed the slipper-making torch over to me when her hands needed to give up knitting. My dad has had the same homemade slippers made for him since as far back as I can remember; made with tassels every time. I’m not going to be the one to stop that tradition.
I’ve made a shrug and blanket in the past as well. Knitting is very relaxing to me if the pattern is fairly simple. Someday, when there’s more time, I hope to make myself a sweater (preferably with pockets). A scarf would be nice too and maybe a pair of fingerless gloves. When it comes to making clothes, I would pick knitting over crocheting any day.
For my amigurumi though, just leave me with some yarn, a stitch marker, and a size E crochet hook, and I’ll be good to go. Oh, and a pair of scissors would be nice! Thanks.
Which do you prefer: knitting or crocheting? Why? What is your favorite thing that you’ve ever made with yarn?
Enter to win the A to Z Challenge Giveaway (amigurumi crocheted dog) here.
-
A to Z Challenge: H is for Hot Glue and Rock Sculptures
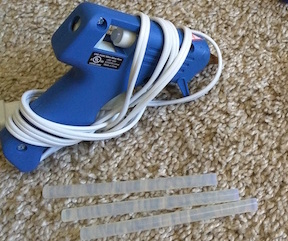
I remember a time when my dad used to help me with my crafts that required use of a hot glue gun. They certainly do get hot, but it’s amazing what you can create with them!
I’ve made Popsicle Stick picture frames (see post later this month on making one yourself), sock puppets (more on this to come in April), and fun rock sculptures as well. There is really no end to what you can create with the use of a hot glue gun!
You may get a few burns along the way, especially if you’re klutzy like me, but it’s always well worth the resulting 3D art! Speaking of which, I’d like to share with you how to make one of those rock sculptures I was talking about.
Let’s Make Something Fun! Caterpillar Rock Sculpture
-
A to Z Challenge: C is for Crochet
Crocheting has changed so drastically from how it began, back as early as the 1700s (though it’s turned up more noticeably since the early 1800s). It started with uses more practical to the times: creating nets and traps for hunters and fisherman. Later on, it became used for more decorative purposes (See more on crochet history).
From there crochet evolved again. Homes were adorned with granny square blankets thrown over the backs of sofas, and doilies found themselves the centerpieces on tables or for giving style to a nice side table lamp. Homes were given a softer, more cozy feel, by the crocheted pieces that were placed carefully around them.
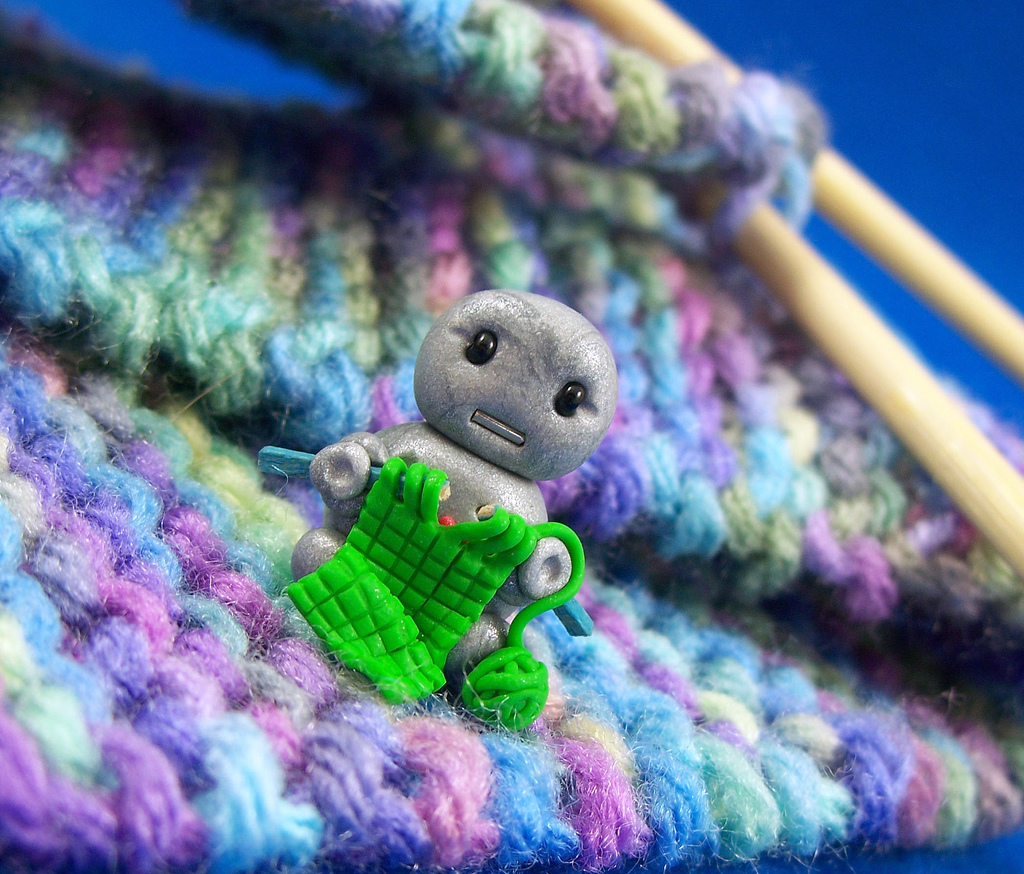
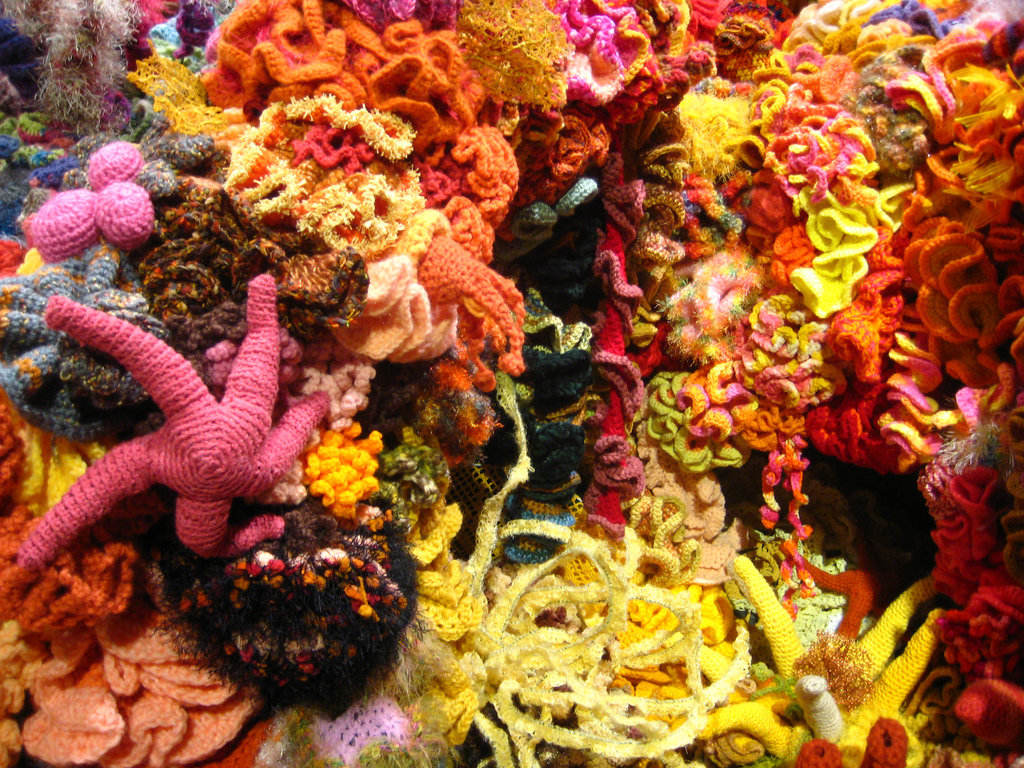
Artists nowadays are taking the hobby of crochet to new heights, creating 3-D sculptures that are considered art alongside clay busts and paintings hung up on the wall.
It never ceases to amaze me what artists can do with the fewest amount of resources and tools. Who knew that simply having some yarn, a crochet hook, and a yarn needle, could create something like the underwater scene above?
New levels of cuteness using crochet, were found when the art of making amigurumi was brought over from Japan (see my post on
A to Z Challenge: A is for Amigurumi
-
A to Z Challenge: A is for Amigurumi
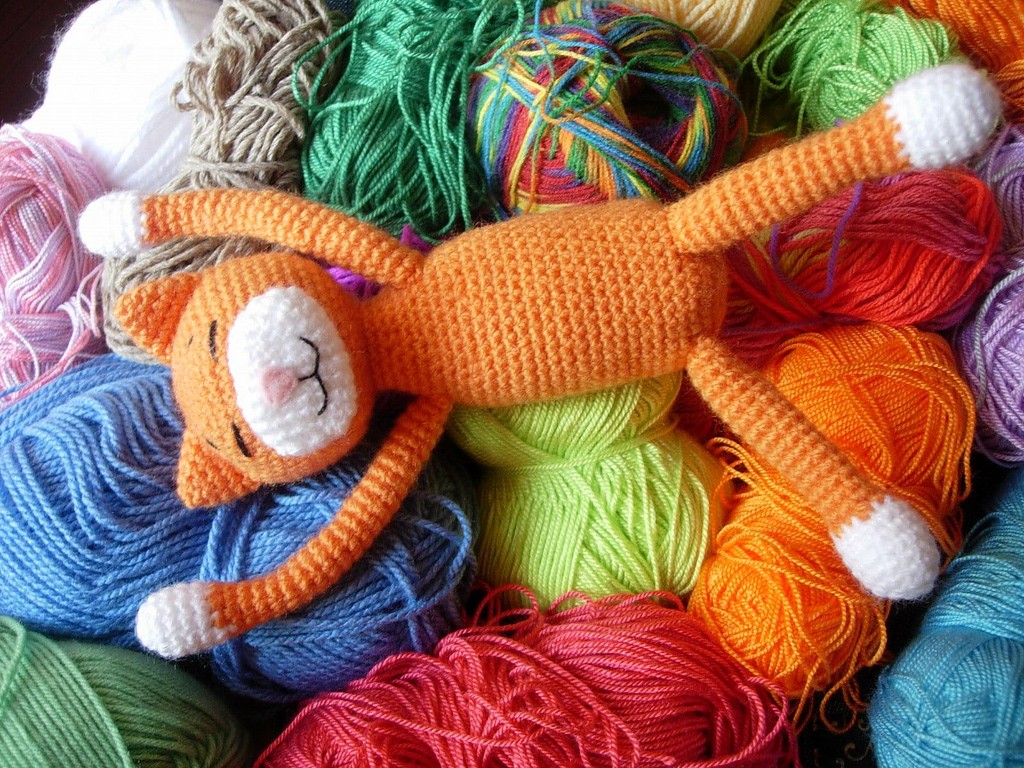
Amigurumi is a Japanese word meaning crocheted or knitted, stuffed doll (Ami = crocheted/knitted; Nuigurumi = Stuffed Doll). Most of the pieces for these stuffed dolls, are worked by crocheting in the round.
The art of amigurumi had been widely enjoyed in Japan for decades, before making its way to the United States. It was in the early 2000s that it gained in popularity with sites like Etsy (an online marketplace for handmade goods) and
Ravelry